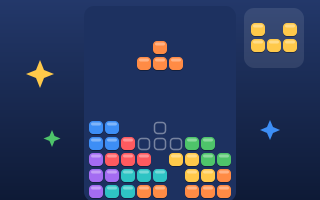
Falling-Block Puzzle Strategy: Stack Flat, Keep a Well, Read Ahead
Falling-block puzzles look like reflex games, and at high speed they are. But most games are lost long before the pieces get fast. They’re lost to a stack that slowly turned jagged, a hole that got covered, or a straight bar that arrived with nowhere to go. The good news is that these are habits, and habits can be learned.
We’ll use our own Block Drop as the example throughout. Its well is 9 columns wide and 16 rows tall, it deals 12 shapes (including a single dot, a domino and a five-cell cup), and it speeds up every 8 cleared rows. Almost everything below also applies to other games in the genre.
The one idea behind everything: keep your options open
Every placement decision really comes down to one question: after this piece lands, how many different pieces could I place cleanly next?
A flat surface can take nearly anything. A surface with a single one-wide pit three rows deep can only take a straight bar. A surface with a covered hole takes nothing useful at all until you dig back down to it. So the goal is not really to clear rows. It’s to keep the stack in a shape that can accept whatever comes. Row clears follow naturally.
Stack flat
“Flat” does not mean perfectly level. It means the difference in height between neighboring columns stays small, ideally one or two cells at most.
A few concrete habits help:
- Place pieces on their widest side when you can. A T laid flat covers three columns and raises each by one or two. Stood on end, it raises one column by three.
- Fill low spots before building on high ones. If one side of the stack is two rows lower, send the next few pieces there, even if it means passing on an easy single-row clear elsewhere.
- Match the piece to the step. The hook-shaped pieces fit neatly against a one-cell step, and the zigzags fit a one-cell step going the right direction. Before dropping a zigzag, check which way the surface steps. Placed the wrong way it almost always leaves a hole.
In Block Drop the small pieces are extra helpful here. The dot, the domino and the three-cell corner can fill a single-cell dip that none of the four-cell pieces can fill without leaving a gap. Treat them as repair tools and try not to spend them on open, flat ground.
Keep a well column
Clearing four rows with one straight bar is worth far more than four single clears. In Block Drop it’s 800 points times your level against 400 for four singles. To make that possible, you need a well: one column, usually at the edge, that you keep empty while the rest of the stack rises beside it.
A few things experienced players get right about wells:
- Only one. Two open columns means two places that only a straight bar can fill, and you’ll only get one bar at a time.
- At the edge, usually. An edge well needs only one clean wall of stack beside it. A middle well splits your stack in two, and both halves have to stay flat on their own.
- Not too deep. If your well gets deeper than four rows, even a straight bar can’t clear everything. At that point, stop building and take a single or double clear with whatever fits.
- Keep the lip clean. The column right next to the well is the one most likely to get an overhang that roofs the well over. Watch it closely.
Block Drop’s bag makes wells fairly reliable: the straight bar appears three times in every bag of 28 pieces, so a long drought is unlikely. Other games use different randomizers, and with pure random dealing you should be a little more cautious about depth.
Read the next piece
The Next preview is the most underused tool in the game. Beginners look at it after placing the current piece. Better players look at it before, because it changes where the current piece should go.
A simple routine that works:
- Look at the current piece and the next piece together.
- Find a spot for the next piece first. Where will it fit cleanly?
- Place the current piece somewhere that doesn’t ruin that spot.
This matters most with awkward pieces. If a cup is coming next in Block Drop, you want either a one-cell bump for it to sit over, or a flat stretch three cells wide, and the current piece should leave one of those for it. If the square is coming, you want a flat area two cells wide.
Reading ahead also tells you when to wait. If the next piece is the straight bar and your well is ready, don’t take a single clear with the current piece. Put it somewhere harmless and let the bar take four rows.
Handling holes
Sooner or later you’ll cover a hole. It happens to everyone. The mistake is building on top of it and hoping.
A covered hole only goes away when you clear every row above it. So the plan is:
- Stop adding height above the hole.
- Clear the rows directly above it, one at a time if needed.
- Once the hole is exposed, fill it with a small piece.
Two covered holes at different heights are much worse than two in the same row, because you have to dig to each separately. If you have to create a hole, try to put it in a row that already has one.
Surviving the speed levels
Block Drop starts at one row every 0.82 seconds and gets 70 milliseconds faster every level, topping out at 0.09 seconds per row from level 12. Somewhere in the middle, your strategy has to change.
Shorter plans. At high speed you don’t have time to consider every column. Decide on a small set of good landing spots, and make your stacking regular enough that one of them is always available.
Lower stack. At slow speeds a stack halfway up the well is fine. At high speeds keep it in the bottom third. A lower stack gives each piece more fall time, which means more time to move it into place.
Hard drop more. Once the piece is lined up, hard drop it. Waiting for gravity is wasted time you’ll need for the next piece. In Block Drop a hard drop also scores 2 points per row fallen.
Rotate early. Rotate a piece as soon as it appears, then slide it. Trying to rotate near the bottom, next to other blocks, is when unexpected kicks happen. Block Drop nudges a blocked rotation sideways by up to two cells or up by one row, which helps, but it’s still better not to need it.
Take singles and doubles. Four-row clears are great on levels 1 to 6. At top speed, a quick single that keeps you alive is worth more than a risky well.
Practice ideas
If you want to improve deliberately rather than just play more:
- Play a game where you never make a hole. Score doesn’t matter, only the no-hole rule. It forces you to think about piece-to-surface fit.
- Play a game using only hard drop. It builds the habit of lining pieces up before they fall.
- Say the next piece out loud. It sounds silly, but it trains you to check the preview every single time.
Put together, the approach is simple: stack flat, keep one clean well, look at the next piece before you place the current one, and adjust your ambitions as the speed goes up. Try it in Block Drop. Your best score is saved in your browser, so you can see whether it works.